Our alerts have the ability to send from one of your email addresses. This is especially important and needed for customer-facing alerts (i.e. ID181/Service Call Status and ID800/Past Due Invoices), as your customer may elect to reply to this email or, if not recognized by your customer, the email could be sent to their spam.
Below are instructions and reference articles on setting up the needed "Send As" (not "Send on Behalf of" permissions).
Office365:
If you elect to NOT set up the outbound connector (though we strongly advise to set the outbound connector because using smtp.Office365.com comes with some restrictions. The biggest one is a 30 message per minute rate limit which we can, and likely will, hit very easily. It can cause unexpected results like notifications only being partially delivered, some surveys may not reach your customers, etc.), please set here:
Send email as another User
1. Go to Office 365 ** admin center ** > Users > Active Users.
2. Choose the the user mailbox you want to give ceojuice permissions to, then click on Edit next to Mailbox permissions.
3. In the search box under Send as, type the name of the ceojuice user to allow to send send as permissions.
4. Once you've selected your users, click Save.
Send email as a Distribution List Group
1. Go to Office 365 ** admin center ** > Teams & Groups > Active teams & groups > Distribution List.
2. Choose the distribution list group that you want to give ceojuice permissions to, then click on the Settings tab.
3. Under Manage delegates, click on the Edit manage delegates link.
4. On the Edit delegates pop-up, enter the email address to give permissions to (ceojuice@) under Add a delegate.
5. Once you've selected the user, set the Permission type to ‘Send As’. Click Save
Exchange 2013:
Link to instructions: https://practical365.com/exchange-server/exchange-2013-how-to-grant-send-as-permissions-for-mailbox/
Send As permissions can be granted using the Exchange admin center. Navigate to Recipients, then choose the type of recipient you want to grant Send As right for (in this example I am using a shared mailbox called “Help Desk”). Click the Edit button to open the properties of the mailbox.
Select Mailbox Delegation, then click the + button for the Send As permissions and choose who you are granting the permissions to. Click Add then OK, and then Save to complete the task.
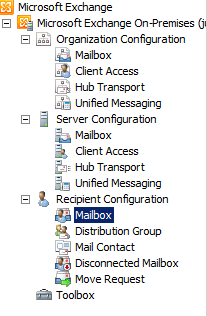
Exchange 2007 / 2010:
If the email@ account is a distribution group then see the url below for instructions:
Open Exchange Management Console. Go to Recipient Configuration -> Mailbox
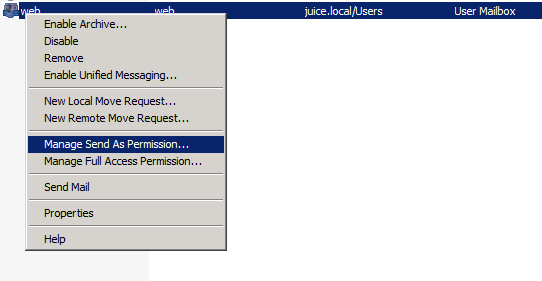
Right click on the mailbox that we need permission to, and go to Manage Send As Permission.
Click Add, and add the CEOJuice mailbox.
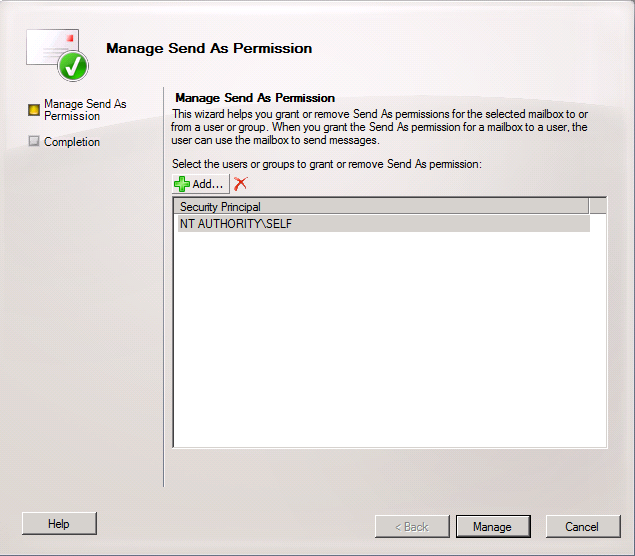
Click Manage.
Hosted Exchange:
In the Exchange admin page, open up the mailbox and go to Delegation, add CEOJuice to the Send As permissions box.
0 Comments